Eggplants and tomatoes from the garden.
Roasted, sauced and sauteed.
Word up.
Roasted Garden Pasta with Garlic Sausage
- Rotini (spiral) pasta
- 4 small (1 medium) eggplant
- 3 to 4 garden tomatoes
- 5 cloves garlic
- 1 medium sweet onion
- 2 tbsp fresh Oregano
- 6 leaves fresh basil
- 1/3 c sherry
- Onion powder, Garlic Powder, Salt
- 5 links (1 package) Trader Joe's Garlic Chicken Sausage
Preheat oven to 400. Peel and chop eggplant into cubes and transfer to a bowl with cubed tomatoes and whole, peeled garlics. Toss vegetables with olive oil, onion and garlic powders and salt, spread out on a baking sheet, and roast until eggplant is tender and tomatoes are soft - about 25 minutes.
Meanwhile, boil water and cook pasta, then drain and set aside. Slice sausage and brown in a skillet, and then add the thin-sliced onions and stir. When onions are translucent and sausage is crispy, pour in the sherry, scraping the bottom of the pan to mix in any flavorful bits from the sausage. Next, add in your roasted vegetables and finally your fresh herbs, and cook on high, stirring vigorously as the tomatoes begin to break down and release their juice. Add in our pasta, toss to coat and serve hot in bowls, topped with Parmesan cheese.
Find this linked at Tasty Tuesdays, Tuesday at the Table, and Tasty Tuesday Party
Tuesday, August 30, 2011
Sunday, August 28, 2011
Homemus
Do you have a blender? Do you have a can of chickpeas?
Then you have Hummus.
Yep, it's pretty much that easy. Throw all ingredients in the blender, blend till smooth, scoop onto a plate, scoop with veggies, and enjoy! That's it!
This is as versatile as it is healthy; season with any spices you want, from savory to sweet, and top with different spreads and tapenades.
I made a garlic hummus topped with roasted red pepper spread, and (not to toot my own horn...) as far as hummus goes, it was pretty good.HOMEMADE HUMMUS
- 1 can chickpeas
- 1/3 c juice from chickpeas
- 1 tbsp lemon juice
- salt to taste
- spices/seasonings of your choice
Put all ingredients in a blender and blend till smooth. Serve with veggies, crackers, pickles, fingers.
Oven "Tandoori" Shrimp
This was one of those experiment meals, where you're not sure quite what you're doing, just following some idea you had some time...
For me it usually starts with some ingredient that I have on hand, and then an image pops into my head, and the unfolding meal is cooked more with my gut than my mind.
This has been the story for many of my best meals, as well of some of the more lackluster...
That being said, this attempt at Tandoori Shrimp was good, and in its own way very flavorful - it just wasn't quite what I was going for. Also, next time would use regular yogurt instead of greek yogurt, as I suspect it might create a moister shrimp and caramelize a little better.
So, it worked, but it needs some work.
Oven TANDOORI Shrimp
w/ Vegetables
(serves 3)
- 1 lb jumbo shrimp, shelled
- 1 1/2 c yogurt
- juice of 1 lemon
- 3 cloves garlic, minced
- 1 tbsp garam masala
- 1 tbsp cumin
- 3 tsp smoked paprika
- 1 tsp ginger
- 1 tsp curry
- 1 tsp dry mustard
- 1 tsp red chili
Vegetables:
- 1/3 each red, yellow, orange, green bell peppers
- 1/2 white onion
- 3 cloves garlic
- 1 tbsp garam masala
- 1/2 bunch fresh cilantro
Combine all of the spices for the marinade, stir together the yogurt and the lemon juice, and then add the spices to the yogurt and mix well. In a ziplock bag, pour marinade over peeled shrimp, seal, and let marinate in the refrigerator for at least 2 hours.
Preheat oven to 400. Heat a cast iron griddle on high, slice and then saute onions in olive oil. Slice garlic and add it to the onions and then slice and add the peppers. Sprinkle vegetables with tablespoon of garam masala when they begin to soften, push them to one side of the griddle and turn that burner off. Coat the cleared side of the griddle with oil and lay on the shrimp. Turn oven to BROIL, flip shrimp, and transfer griddle to oven to broil for about 1 to 2 minutes. Shrimp is done when pink and dry-looking on the outside (be careful not to overcook) but should be moist on the inside.
Remove griddle from oven, combine shrimp and vegetables, and sprinkle with the chopped cilantro. Serve garnished with a lemon wedge alongside Jasmine Rice with Peas, and Homemade Onion Chutney.
Saturday, August 27, 2011
Roasted Butternut and Cranberry Salad
Butternut Squash and cranberries belong together. And who are you to get in the way of the universe?
Roasted Butternut and Cranberry Salad
- 2 small butternut squash
- 1 tbsp olive oil
- 1 tbsp cinnamon
- 1 tsp ginger
- 1 tbsp brown sugar
- 1 large sweet onion, sliced thin
- 1/8 c brandy
- 1/8 c balsamic vinegar
- 4 leaves fresh sage, minced
- 1 tbsp powdered thyme
- 1/2 pckg dried cranberries
Preheat oven to 375. Cut the ends off of the squash, peel and then slice into cubes, about 1 inch in size. Toss squash with olive oil and then the cinnamon, ginger and brown sugar. Spread squash out on two aluminum foil-covered baking trays and roast for 30 minutes, or until tender.
Meanwhile, in a skillet, saute onions in olive oil and when soft add in the brandy and balsamic vinegar. Stir in cranberries and cook until liquid is absorbed.
In a large bowl, add roasted squash, sauteed onions, minced sage, thyme and sea salt, and toss to combine. Let the salad sit out or in the fridge for a least an hour before serving so flavors have time to combine. Stir before serving and enjoy.
Thursday, August 25, 2011
BANANA (bread)
I make the best banana bread in the world.
Proven fact.
Books have been written about supporting this.
Holy books.
Delicious holy books.
full of bananas
BANANA (bread)
- 5 whole overripe bananas
- 1 ripe banana, sliced
- 1 c white flour
- 3/4 c whole wheat flour
- 1 tsp baking soda
- 1/4 tsp salt
- 1 tsp cinnamon
- 1/4 tsp nutmeg
- 1 stick butter, melted and cooled
- 3/4 c brown sugar
- 2 eggs
- 1 tsp vanilla extract
- toasted walnuts
Preheat oven to 350. Put 5 overripe bananas in a microwaveable bowl, cover with plastic wrap, and microwave on high for 5 minutes. There will be liquid in the bowl - pour liquid into a saucepan and strain bananas over saucepan for about 10 minutes, then transfer to a bowl. Bring liquid to a boil, then reduce heat and simmer until reduced to about a 1/4 c of liquid. Add liquid to bananas and mash until smooth, and then stir in your melted butter, sugar, eggs and vanilla. In a large bowl whisk together flours, baking soda, salt, cinnamon and nutmeg and then add in the wet mixture, stirring until well combined. Gently fold in walnuts (and any other add-ins) and pour batter into a greased loaf pan. Arrange the sliced banana in two strips down the center of the loaf, sprinkle the top with a tablespoon of sugar, and then bake for 40 - 50 minutes until a toothpick inserted in the center comes out clean. Run a knife around the edges and let cool for 15 minutes before removing from loaf pan and slicing.variations; add in raisins or chocolate chips, swap out walnuts for pecans, and also feel free to substitute sour cream or applesauce for half the butter, and even maple syrup for the sugar...go wild, make it yours.
* I also make a vegan version of this for two friends of mine who absolutely love it; simply use soy margarine instead of butter, omit the eggs entirely; there are enough bananas to act as a binder so the missing eggs don't make any difference. If the batter seems too dry, add a splash of almond or soy milk.
Crispy Salt and Pepper Trout
TROUT. that's all I have to say; TROUT.
But seriously, there are few things better than a whole, crispy-skinned Trout, with it's mild, delicate flavor, it just tastes fresh, like summer itself, and with the last days of August coming on, you should head over to your local fish counter and bring some home, do the body some good.
Like I said, I like a good, crispy-skin on my trout, and sprinkled the fish with salt and lemon pepper before briefly pan-frying one side and sticking it in the oven to bake. For flavor I brushed the flesh inside the fish with a horseradish sauce, then sprinkled it with onion and garlic powder and finally added chopped fresh dill and a sprig of rosemary. I gave the fish a minute under the broiler before serving, and they came out crispy, moist, and absolutely delicious.
If you're not used to buying, cooking, or seeing whole fish, live a little; they don't bite...
Crispy Salt and Pepper Trout
- Whole Rainbow Trouts
- Salt
- Lemon Pepper
- Creamy Horseradish Sauce
- Onion and Garlic Powders
- Fresh Dill, chopped
- Sprigs fresh Rosemary
Preheat oven to 350. Pat fish dry with paper towels, then spray skins lightly with Olive Oil cooking spray and sprinkle with salt and lemon pepper. Use a brush to paint the insides of the fish lightly with the horseradish sauce, sprinkle with onion and garlic powders and fresh dill and then tuck in the sprig of fresh rosemary before folding the fish closed.In a shallow cast iron skillet, heat olive oil until very hot, then melt a pat of butter and lay the fish side-by-side in the pan. Cover and bake in oven for 5 minutes before turning on the broiler and removing the lid to crisp the fish for 1 minute or so. The flesh should appear white and flaky, but moist.
Garnish with a lemon wedge and serve fish alongside Garlic "Butter" Mushrooms and Green Bean in Balsamic Butter, and if that's not a meal, then I don't know what is...
Garlic "Butter" Mushrooms
These mushrooms are a garlicky, buttery, complement to everything from steak to fish to salad to...actually they're even good on their own. Trick is, they don't even have any butter in them. I really like marinated or sauteed mushrooms, but they are often way too oily and slimy, but these babies achieve the same effect with out any of the sliminess. I got the idea from Kevin at Closet Cooking, who adds water to aid the process of caramelizing onions, but instead of onions I used mushrooms, and instead of water I used brandy. The results? Outstanding.Garlic "Butter" Mushrooms
- 1 box Baby Portobella Mushrooms
- 1/4 c Brandy
- 3 cloves Garlic, pressed
- salt to taste
Stem mushrooms and cut caps in quarters. In a cast iron skillet, heat olive oil, add mushrooms, and saute. When most of oil is absorbed, add brandy, cover and when most of the liquid is absorbed, add salt and garlic and stir. Cook for another minute, stirring until mushrooms are coated in garlic. Serve hot.
Green Beans in Balsamic Butter
This is a good way to enjoy green beans, hot or cold.
Green Beans in Balsamic Butter
- 1 lb fresh Green Beans
- 2 shallots (or 1/2 sweet onion), minced
- 1/4 Balsamic Vinegar
- 1 tbsp butter
Steam Green Beans until aldente, remove from pot and set aside. Saute shallot/onions in a small saucepan with a little olive oil until soft and translucent. Add vinegar, bring to a boil, and then reduce to simmer until all of the vinegar has absorbed into the onions and there is almost no liquid left in the pan. Stir in the tablespoon of butter, transfer mixture to a bowl and let cool in the fridge until ready to use.
Before serving, heat a skillet with cooking spray, add beans and then Balsamic Butter, and toss to coat beans until heated through. Serve immediately, and enjoy.
Monday, August 22, 2011
Maine in a Bowl
What says Maine more than Blueberries?
Lobster.
And so, as any mom anywhere (even in Maine) would say, it wouldn't be right to have dessert before dinner...
Although, like every time, it feels like I left a little of my soul behind in Maine, I brought something home with me too; fresh-picked Maine corn and fresh-caught Maine lobster! We got the lobster from a friend of the family, a lobsterman, who keeps his boat on the dock next door, and the corn came from a local farm that grows Sugar and Butter corn - a sweeter, more robustly-flavored variety that eclipses its tasteless Silver Queen cousin that is so common down here.Lobster, Corn, Green Beans... it was nice to have a little bit of Maine left at the end of a long and depressing drive home, and to top it all off, we had a quart of fresh-picked Maine blueberries that my aunt had sent me home with.
And what could go better with blueberries (or anything for that matter), or be more MAINE, than Maple Syrup? Add some gingersnaps from the country store and vanilla ice cream, and you have a fresh, crunchy, sweet and simply delicious farewell helping of Maine in a Bowl!
Maine in a Bowl
- fresh Blueberries
- 100% pure Maple Syrup
- Ginger Snaps, crushed
- Vanilla Ice CreamIn a small saucepan combine berries and maple syrup at about a 3 to 1 ratio (1 c berries, 1/3 c syrup). Bring to a quick boil and then reduce to simmer just until berries are softened but not bursting. Scoop ice cream into a bowl, top with crushed ginger snaps and a handful of fresh berries, and then top with spoonfuls of blueberry-maple compote.
Thursday, August 18, 2011
Grandma's Cookie Pie
I had barely been in Maine for five minutes before my Aunt told me I couldn't leave without making a Cookie Pie. In this family, Cookie Pie is more than a favorite; it's a tradition, or possible so favorite that it exceeds tradition. At first I made it only every thanksgiving, and would delight Grandma by calling for the recipe which I could never seem to remember but always manage to misplace. But then I started getting requests for Christmas and then birthdays, and now this, as a trade for my freedom (as if I even wanted to leave...)
So, thanks to that stubborn chef, or Mr. Hershey, but mostly thanks to Grandma, I, my family, and now the rest of the world are able to enjoy the warm, chocolatey, artery-clogging goodness that is cookie pie.
COOKIE PIE(makes 1 pie)
- 2 sticks butter, melted and cooled
- 1/2 c flour
- 1/2 c sugar
- 1/2 c brown sugar
- 2 sticks butter, melted and cooled
- 1/2 c flour
- 1/2 c sugar
- 1/2 c brown sugar
- 2 eggs
- 6 oz semi-sweet chocolate chips
- pecans (optional)
Melt and cool butter. Mix flour and sugars in a bowl, add egg and mix, and then add butter. Stir in chocolate chips and nuts, if using, and bake for 40 minutes to an hour, or until the crust is brown and the top of the pie looks crispy. Because of all the butter in the pie, it will not be firm when you take it out of the oven, and may not appear done in the middle, but if you leave it in longer, the crust will burn. What I've found is that it sets as it cools, and no one has ever complained of a Cookie Pie being too gooey... Serve warm with ice cream, or room temperature, or try it cold out of the fridge the next day. Just don't eat it all in one sitting, or at least have an EKG on hand...
- pecans (optional)
variations: consider using peanut butter chips, butterscotch chips or white chocolate chips, depending on your fancy, and you can also try adding banana, raisins, or anything else you would think about putting in a cookie.
(I would love to try making an Oatmeal Raisin version of this, but no one in my family has let me so far. Let me know if you give it a try!)
Sunday, August 14, 2011
WHAT YOU KNEAD (Maple Swirl Bread) !
You know what's special about my Sundays?
Nothing.
No, that's what's special about it; the nothingness.
I try hard to do nothing on Sundays and that needs starting off with a good breakfast.
Alas, the problem is that cooking said breakfast disturbs the tranquil waters of Sunday nothingness, tilts the balance, strays the center, and sometimes we just need to relax...
But that's what's great about this breakfast; you can do all the work the night before and just pop it in the oven before sitting back with a cup of Sunday coffee.
This recipe is a modification of a one that I found online for Cinnamon Swirl Bread; I took it and made it mine. First off, while Cinnamon Swirl is good and all, my heart belongs to Maple, and what sounds better than MAPLE Swirl Bread?
Secondly, I swapped out the 1/2 c milk and 3/4 c water for 1 c of Buttermilk, and 1/4 water to give it a fuller taste and a little more body (I think). And thirdly, as I said, I wanted to make this all ahead of time and only have to pop it in the oven in the morning. The original recipe goes straight from the forming of the loaf to the rising and then the baking, but I rolled the loaf and let it sit in the fridge over night and it came out great. I let it sit out for 1/2 and hour before baking it and brushed the top with a little Maple Syrup, which gave the brown crust a nice sweet flavor.
The bread itself was good too; the fluffy Buttermilk dough is infused with the cinnamon and ground nutmeg, and the Maple Butter curls in moist swirls throughout it all, collecting in a gooey, Mapley center...
Yeah, it's good, and exactly what you knead to start of a slow day of...
MAPLE SWIRL BREAD
- 1 c Buttermilk
- 1 tbsp butter
- 2 tbsp Maple Syrup
- 1/4 tsp salt
- 1/4 tsp Cinnamon
- 1/8 tsp shaved nutmeg
- 1 pckt Active Dry Yeast
- 1/4 c warm water
- 1/2 jar Maple Butter*
- 2 c white flour (plus some for dusting)
- 1 c White Whole Wheat Flour
Melt butter and add to Buttermilk along with salt, cinnamon, nutmeg and Maple Syrup. Dissolve the packet of yeast in the warm water, add to the Buttermilk mixture, and mix well. Stir in 2 1/2 c of the flours and turn out onto a lightly floured surface. Add the last 1/2 c of flour, and knead it into the dough, continuing for around 5 minutes as the sticky dough becomes soft and satiny.
Put the dough into a greased bowl and flip it to coat the top, cover with plastic wrap, and let it sit for 2 hours or so in a warm place.When it has doubled in size, punch the dough to expel the air, turn out onto a floured surface, and roll it into a rectangle. Warm the Maple Butter so that it becomes soft and spreadable, and spread it over the rectangle (You can add cinnamon, raisins or even Maple Sugar if you want to). Then, starting at one end, roll the dough tightly into a log form, and put it into a greased loaf pan, seam-side down. At this point you can either put it in the fridge to rise over night, or you can let it rise in a warm place for 45 minutes to an hour and then bake it right away.In the morning, heat the oven to 350, then let the loaf sit out for a 1/2 hour to rise. Brush lightly with Maple Syrup, and cut three slits in the top before baking until the top is golden brown and the bread gives a hollow sound when tapped. Let it cool for 10 minutes before transferring it to a cutting board and brushing the top lightly again with Maple Syrup. Enjoy it warm and buttered right away and even as toast or French Toast if there's any leftovers...* You should be able to buy Maple Butter in the store, it should be with the honeys. However, alternatively you can substitute by sing real butter and sprinkling Maple Sugar. If all of that fails, you can make this a Cinnamon Swirl Bread if you want, or ANY type of swirl bread for that matter...
Friday, August 12, 2011
Brandied Peach Butter Grilled Chicken and Chioptle Caramelized Onions
This delicious harmony is the happy union of two loves at first sight. One was with a recipe in a magazine for Bourbon Peach Buttered Chicken, and the second was with Chipotle Caramelized Onions on Closet Cooking (check it out). How could I let two things so destined to be together remain apart?
And am I happy I didn't. This dish left a warm sensation in my heart, and I'm not just talking about the the chipotle onions... Smokey, spicy-sweet, as rich and savory as it was fresh, this was a match made in heaven of summer peaches and chipotle peppers.
Listen to your heart and don't let this one get away.
Brandied Peach Butter Chicken
- 5 medium peaches, peeled and chopped
- 1/4 lemon juice
- 1/3 c brandy
- 1/3 c brown sugar
- 1/4 tsp salt
- chicken
In a saucepan, bring peaches, lemon juice and 3 tbsp water to a boil, and then simmer, covered, for 30 minutes. Transfer peaches to a blender with the brandy, brown sugar and salt and blend until smooth.
Pour into a 13 x 9 baking dish, and bake for close to 2 1/4 hours until thick. Sprinkle chicken with salt and pepper, and grill. Before flipping, brush one side of chicken with peach butter, and then the other side.
Chipotle Caramelized Onions
- 4 c onions, sliced
- 3/4 of 1 chili in adobo
- 1 tbsp brown sugar
- 1 tsp balsalmic vinegar
- 1/2 c water
Heat oil in a skillet then add onions, chipotles, brown sugar, vinegar and water. Mix and simmer covered until onions are golden brown and caramelized, about 40 minutes. You may need to add more water as they cook to prevent burning and aid the caramelizing process, but only little bits at a time because the onions will create their own liquid.
Serve Brandied Peach Butter Chicken topped with Caramelized Onions along with a garden salad and ranch dressing on the side. Shed a tear; it's beautiful.
This Awesomeness was shared on:
Wednesday, August 10, 2011
'Fra Diavolo" Style Shrimp Scampi
Have you ever noticed in restaurants how they leave the tail on the shrimp? I have always hated this, having burned or stunk up my fingers many times, going through the annoying process of peeling hot shrimp that i just want to be eating. If you ask the staff about this, as I have, they justify the unshelled shrimp as adding flavor to the dish, which I understand... Now ask me if I care?...wait for it... no!
I haven't noticed any significant difference in flavor between dishes with peeled or unpeeled shrimp, whether eating out or at home, and so, accordingly, I would never plague anyone with having to plunge their fingers into a meal that they just want to eat. However, that doesn't mean there's no pain involved! After all, 'Fra Diavolo' means "brother of the devil"...
This dish came to me out of a craving for shrimp scampi and a passion for spicy food. It combines the freshness of garden produce with the kick of crushed red pepper and chillies, and delivered in a light, but satisfying package of shrimp and pasta, is perhaps the PERFECT summer dish.
But don't take my word for it...give it a go! Pour yourself some wine, gather your ingredients, and prepare to enjoy your dinner. Your taste buds might be singing, but they're happy, trust me...Fra Diavolo Shrimp Scampi
(serves 3)
- 3/4 lb small shrimp, peeled
- 1/2 c clam juice, divided
- 2 tbsp minced garlic
- 3 dried chillies
- 2 tbsp lemon pepper, divided
- 1 tsp sea salt
- 1 medium vidalia onion, finely chopped
- 3 cloves garlic, slice thin
- 1/2 c white wine
- 1 tsp each tarragon, onion powder, fresh oregano
- 1 c garden tomatoes, finely chopped
- fresh basil, chopped
- 1/2 fresh lemon
- angel hair or linguine pasta, for 3
Peel shrimp and combine with 1/4 c clam juice, 1 tbsp lemon pepper, and the 2 tbsp of minced garlic. Let sit in fridge to marinate for at least an hour.
Fill a large pot with water, add dried chillies, and bring to a boil, then add pasta and cook until al dente.
In a large cast iron skillet, caramelize onions in olive oil, then add thin-sliced garlic, and when garlic is softened pour in the wine, clam juice and add the tarragon, oregano, onion powder, salt and remaining lemon pepper. When most of the liquid is evaporated, add chopped tomatoes, and cook until softened, then add the shrimp and a squeeze of lemon juice. Simmer until shrimp is pink and cooked through, then spoon over pasta and top with a healthy pinch of chopped basil. Serve with grated romano or parmesan and a glass of white wine.
This awesomeness was shared on Real Food Wednesday
BBQ "Beef" Salad Wraps with Horseradish
Where's the beef? Not here.
One of the nice things about being home is enjoying the wide variety of meat substitutes available, and the other day I picked up a pack of Trader Joe's Beef-Less, which I hadn't had before. They were pretty good texture-wise, with a mild beefy flavor, but of course I jazzed them up a little with my own seasonings, because that's how I roll. Another thing I've found with meat substitutes is that their portion sizes are out of wack; I don't know who they think they're feeding, but there are definitely not 3 servings in that box... I'm a hungry dude. Anyway, there were some leftovers, and I saved them for lunch, since I had work the next day.
At first I thought salad, and then I thought BORING. I wanted everything a salad has; the veggies, the "beef", the dressing, but the delivery just seemed too ordinary. And then it hit me; WRAP it up! YES! I have a friend who makes wraps with kale leaves, which I've never tried before, but since I was working today in a garden with tons of Dinosaur Kale plants, and therefore plenty of fresh kale leaves, I had to give it a go.
I mixed my beef strips with a spoonful of BBQ sauce for kicks, put it on a pile of shredded carrots, topped it with some roasted red onion slices and then drizzled some horseradish sauce on top to seal the deal before rolling it all up. (I recommend steaming it briefly in the microwave to soften the leaves up a bit for easy rolling.)
All in all, it was tasty and I will be using this concept again. It was everything I wanted from a salad, just in a different shape, and so, more fun! PLAY WITH YOUR FOOD!
BBQ "BEEF" SALAD WRAPS
- Trader Joe's Beef-Less Strips (or other fake meat)
- spoonful BBQ sauce
- 1 carrot, shredded
- roasted red onion, sliced thin
- horseradish sauce (horseradish and mayo)
- 2 leaves of Kale
Mix fake beef with BBQ sauce, shred carrot. Microwave kale in a wet paper towel for less than 30 seconds, to soften it for wrapping. On each leaf, pile shredded carrots, then BBQed "beef", then sliced onions, and dribble it with some horseradish sauce. Fold the sides of the leaf in, to keep all the deliciousness safely inside as you roll it all into two wraps. Serve with chips and enjoy.
Tuesday, August 9, 2011
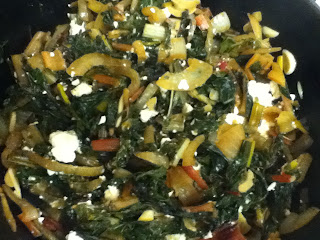
Easy-Cheesy Swiss Chard
These days, Swiss Chard is pretty ubiquitous, but for those of you who don't know, it's a green, like spinach, only better. It has a mild flavor and lends itself to everything from pasta to salads, and is just as enjoyable straight up.
One of my favorite ways to eat it is how my mom has always made it, mixed with sauteed onions, cooked down in broth, and finished off with feta cheese that gives it a salty, butteriness that is, well, delicious!
Cheesy Swiss Chard
- 1 bunch swiss chard, chopped
- 1 medium sweet onion, sliced thin
- 4 cloves garlic, sliced thin
- salt and pepper
- 1/4 c cooking sherry
- 1/4 c vegetable broth
- splash of Worcestershire sauce
- 1/2 c reduced fat feta cheese
Saute Onions in Olive Oil, salt and pepper until translucent, then add garlic and chopped swiss chard stems.
Pour in the sherry, and then put in all of the chopped greens. Pour in veggie broth and Worcestershire sauce and use tongs to bring the greens on the bottom to the top, repeating continually as the greens cook down. Cover and let simmer, mixing occasionally for about 5 minutes or until greens are dark in color and tender. Drain most of the liquid in the bottom and stir in the feta before transferring to a bowl and serving.
Sunday, August 7, 2011
Charred Zucchini Salad
This is an original recipe of mine, and one of my favorites not just because I made it up, but also because it's freakin delicious!
Every summer I grow way too many Zucchinis and have to figure out what to do with them. In the past I've made stir frys, fritters, breads. I've pickled them, stuffed them, even eaten them raw.
And then I came up with this salad. It requires a little bit of forethought, just for the needed marinating and chilling prior to serving, but the final product is well worth it.
Deep and savory, yet refreshingly light, this salad gets all its freshness straight from the garden. It is simple goodness and a consistent crowd pleaser at summer barbecues. This is a recipe for your recipe books. Give it a try, you'll be happy you did.
(serves 4)
- 2 medium zucchinis, sliced in 1/2 inch rounds
- 1 small red onion, peeled
- 1 c garden cherry tomatoes
- fresh basil, chopped
- 1/4 c asiago, shredded
dressing
- 1/8 c Balsamic Vinegar
- 1/8 c Balsamic Hot Sauce
- 2 tbsp olive oil
- 1 tbsp dried Basil
- 1 tbsp dried Oregano
- 1 tsp Black Pepper
Marinate sliced zucchini and the whole onion in dressing for at least 3 hours. Turn on grill and spray with cooking spray. Grill zucchini, basting with dressing as it cooks, until charred on one side, then flip, and remove from grill when charred on the other side. Cook and baste onion until soft and tender, remove from grill, and let cool before slicing into thin strips. In a bowl mix zucchini, onion, and quartered cherry tomatoes with chopped basil, cover and let sit in fridge, letting the flavors combine until cool. Top with shredded asiago before serving, and get ready to take all the delicious credit (except for inventing it!).
This Awesomeness was shared on;
Seasonal Saturdays on Bella Vita's Blog
This Awesomeness was shared on;
Seasonal Saturdays on Bella Vita's Blog
Subscribe to:
Posts (Atom)